Well-Child Checkup: 12 Months
I am better at standing and stepping and may try to let go to stand alone. Soon I will be taking steps. Though tentative at first, I will soon become very brave. Watch for my falls, so I don’t hurt myself too badly. It is time to put objects like those on the coffee table out of my way.
I am not content to stay on the ground, and I will be climbing soon _ onto and over everything imaginable.
I can try feeding myself with my hands now and could be drinking from a cup. I should be eating with the rest of the family. Discontinue the use of my bottles and pacifiers. I can babble (say things like "da" or "gaga") and may be able to reproduce some words with meaning. I can understand when you talk to me. Pretty soon I will be able to wave bye-bye and point at objects I'm interested in.
Please remember to:
Use my car seat reverse-facing until I am two years old or when I have outgrown the weight or height limits on my car seat. Make sure the house is “baby-proof” and “poison-proof.” Keep me out of the kitchen _ there is too much danger with hot appliances and food I can choke on. Watch my ability to climb, so I don’t fall too far. Never leave me unattended in the bathtub or in the yard. I am fearless and need you to teach me about safety. Talk and read to me a lot. I learn to speak by listening to you.
Discipline Basics
The first goal of discipline is to protect your child from danger. Another important goal is to teach your child an understanding of right from wrong. Reasonable limit setting keeps us from raising a “spoiled” child. To teach respect for the rights of others, first teach your child to respect your rights and that you respect hers. Begin external controls by six months of age.
Children don’t start to develop internal controls (self-control) until three or four years of age. They usually continue to need external controls, in gradually decreasing amounts, through adolescence.
Guidelines for Setting Rules
-
Prevent discipline problems when you're able to. Routines and consistency work well for all ages to prevent bad behavior. An- other technique that is especially effective for all ages is to praise good behavior ("catching" your child being good), which is often more effective than punishing bad behavior. Offering age-appropriate choices can also lead to good behavior. For example, temper tantrums and bad behavior in a toddler can often be pre- vented by offering the child the opportunity to choose from several acceptable choices ("Do you want to eat a banana, an apple, or a pear?"), which gives them the satisfaction of getting to choose, but also accomplishes what you want as well.
-
Discipline varies by the age and developmental level of the child. Begin discipline after six to nine months of age. For young infants, distraction is the best policy. Once infants can crawl, start setting limits and creating a few simple but important rules, like not touching the stove. For a toddler from age one to two years, discipline should be brief (for example saying "No. No hitting.") and consistent. For children two years and older, a brief explanation and a brief time out (1 minute per year of age) works well for bad behavior. Explanations can become more complex as the child gets older.
-
Express each misbehavior as a clear and concrete rule. Examples of clear rules are “Don’t push your brother” and “Don’t interrupt me on the telephone.” For a young infant or toddler, statements need to be even simpler like "No hitting" or "No biting."
-
Also state the acceptable or appropriate behavior. Your child needs to know what is expected of him or her. Examples are “Play with your brother,” “Look at books when I’m on the telephone,” or “Walk, don’t run.”
-
Ignore unimportant or irrelevant misbehavior. Avoid constant criticism. Behaviors such as swinging the legs, poor table manners, or normal negativism (saying "no") are unimportant during the early years and will go away on their own.
-
Use rules that are fair and attainable. A child should not be punished for behavior that is part of normal emotional development, such as thumb sucking, fears of being separated from the parents, and toilet training accidents.
-
Concentrate on two or three rules initially. Give highest priority to issues of safety, such as not running into the street, and to the prevention of harm to others. Of next importance is behavior that damages property. Then come all the annoying behavior traits that wear you down (such as tantrums or whining).
-
Avoid trying to change “no-win” behavior through punishment. Examples are wetting pants, pulling their own hair, thumb sucking, body rocking, nose picking, masturbation, not eating enough, not going to sleep, and refusal to complete schoolwork. The first step in resolving such a power struggle is to withdraw from the conflict and stop punishing your child for the misbehavior. Then give your child positive feedback when he or she behaves as you’d like.
-
Apply the rules consistently. After the parents agree on the rules, it may be helpful to write them down and post them so that parents and all other caregivers can offer consistent rules.
Discipline Techniques (Including Consequences)
Techniques to use for different ages are summarized below:
-
From birth to six months: no discipline necessary.
-
From six months to three years: structuring the home environment to prevent problems, distracting, ignoring bad behavior, verbal and nonverbal disapproval, physically moving or escorting, and temporary time-out (one minute per year of age).
-
From three years to five years: the preceding techniques (especially temporary time-out) plus natural consequences, restricting places where the child can misbehave, and logical consequences.
-
From five years to adolescence: the preceding techniques plus delay of
a privilege, “I” messages, and negotiation via family conferences.
-
Adolescence: logical consequences, “I" messages, and family conferences about house rules; time-out and manual guidance can be discontinued.
The techniques mentioned above are further described below:
-
Structure the home environment. You can change your child’s surroundings so that an object or situation that could cause a problem is eliminated. Examples are using gates, locks, and fences, or keeping "tempting" items (like breakable items or the remote control) out of sight and out of reach.
-
Distracting your child from misbehavior. Distracting a young child from temptation by attracting his or her attention to something else is especially helpful when the child is in someone else’s house or a store (for example, distract with toys or games).
-
Ignore the misbehavior. Ignoring helps to stop unacceptable behavior that is harmless, such as tantrums, sulking, whining, quarreling or interrupting. Getting a response (even a negative one) often reinforces a behavior.
-
Use verbal and nonverbal disapproval. Mild disapproval is often all that is required to stop a young child’s misbehavior. Get close to your child, make eye contact, look disappointed or stern, and give a brief “No” or “Stop.”
-
Physically move or escort (“manual guidance”). “Manual guidance” means that you move a child from one place to another (for example, to the car or time-out chair) against his will and help him as much as needed (for example, carrying).
-
Use temporary time-out. Time-out is the most effective discipline technique available to parents. Time-out is used to interrupt unacceptable behavior by removing the child from the scene to a boring place, such as a playpen, corner of a room, chair, or bedroom. Time-outs should last about one minute per year of age and not more than five minutes.
-
Restrict places where a child can misbehave. This technique is especially helpful for behavior problems that can’t be eliminated. Allowing nose picking and masturbation in your child’s room prevents an unnecessary power struggle.
-
Use natural consequences. Your child can learn good behavior from the natural laws of the physical world; for example, not dressing properly for the weather means your child will be cold or wet, or breaking a toy means it isn’t fun to play with it anymore.
-
Use logical consequences. These should be logically related to the misbehavior, making your child accountable for his or her problems and decisions. Many logical consequences are simply the temporary removal of a possession or privilege if your child has misused the object or right.
-
Delay a privilege. Examples of work before play are, “After you clean your room, you can go and play,” or “When you finish your homework, you can watch television.”
-
Use “I” messages. When your child misbehaves, tell your child how you feel. Say “I am upset when you do such and such.” Your child is more likely to listen to this than a message that starts with “you.” “You” messages usually trigger a defensive reaction.
-
Negotiate and hold family conferences. As children become older, they need more communication and discussion with their parents about problems. A parent can begin such a conversation by saying, “We need to change these things. What are some ways we could handle this? What do you think would be fair?”
-
Discontinue any physical punishment. Most out-of-control children are already too aggressive. Physical punishment like spanking or hitting a child's hands teaches them that it’s acceptable to be aggressive (for example, hit or hurt someone else) to solve problems.
-
Discontinue any yelling. Yelling and screaming teach your child to yell back; you are thereby legitimizing shouting matches. Your child will respond better in the long run to a pleasant tone of voice and words of diplomacy.
-
Don’t forget to reward desired behaviors. Don’t take good behavior for granted. Watch for behavior you like ("catch" your child being good), and then praise your child. At these times, move close to your child, look at him or her, smile, and be affectionate. Specifically praise the good behavior by saying something like, "Thank you for picking up your toys!" A parent’s attention is the favorite reward of most children.
Guidelines for Giving Consequences (Punishments)
-
Be unambivalent. Mean what you say and follow through immediately or as soon as possible.
-
Correct with love. Talk to your child the way you want people to talk to you. Avoid yelling or using a disrespectful tone of voice. Correct your child in a kind way. Sometimes begin your correction with “I’m sorry I can’t let you...”
-
Apply the consequence immediately. Delayed punishments are less effective because young children forget why they are being punished. Punishment should occur very soon after the misbehavior and be administered by the adult who witnessed the misdeed.
-
Make a one-statement comment about the rule when you punish your child. For example, "No pulling the cat's tail." Also restate the preferred behavior ("Please be gentle.") but avoid making a long speech.
-
Ignore your child’s arguments while you are correcting him or her. This is the child’s way of delaying punishment. Have a discussion with your child at a later, more pleasant time.
-
Make the punishment brief. Take toys out of circulation for no more than one or two days. Time-outs should last no longer than one minute per year of the child’s age and five minutes maximum.
-
Follow the consequence with love and trust. Welcome your child back into the family circle and do not comment upon the previous misbehavior or require an apology for it.
-
Direct the punishment against the misbehavior, not the person. Avoid degrading comments such as “You never do anything right," or "You're so bad."
Call Our Office During Regular Hours If:
-
Your child’s misbehavior is dangerous.
-
The instances of misbehavior seem too numerous to count.
-
Your child is also having behavior problems at school.
-
Your child doesn’t seem to have many good points.
-
Your child seems depressed.
-
The parents can’t agree on discipline.
-
You can’t give up physical punishment. (NOTE: Call immediately if you are afraid you might hurt your child.)
-
The misbehavior does not improve after one month of using this approach.
Recommended Reading
Edward R. Christophersen: Little People. Westport Publishers, Kansas City, MO, 1988.
Don Dinkmeyer and Gary D. McKay: Parenting Young Children. American Guidance Service, Circle Pines, Minn., 1989.
Michael Popkin: Active Parenting. Harper and Row Publishers, San Francisco, 1987.
Jerry Wyckoff and Barbara C. Unell: Discipline Without Spanking or Shouting. Meadowbrook, Deephaven, Minn., 1984
Discipline: Time-Out Technique
Definition
Time-out is a form of discipline used to
interrupt unacceptable behavior by isolating a child in a chair or room for a brief period of time. Time-out has the advantage of providing a cooling-off period for both the child and the parent. It gives a child over two or three years old a chance to think about his misbehavior and feel a little guilty about it. When a child is less than two years old, time-out mainly establishes who is in charge.
Misbehaviors that respond best to time-out are aggressive, harmful, or disruptive behaviors that cannot be ignored. Time-out is much more effective than spanking, threatening, or shouting at your child. Time-out is the best form of discipline for many of the irrational behaviors of toddlers. As a child grows older, use of time-outs can gradually be replaced with logical consequences.
Choosing a Place for Time-Out
Playpens. Playpens are a convenient place for time-out for older infants. A playpen near a parent is preferable to isolation in another room because most infants are frightened if they are not in the same room as their parent. Cribs are not an ideal location for time-out because this can lead to sleep problems.
Chairs or corners. An older child can be told to sit in a chair. The chair can be placed facing a corner. Some parents prefer to have their child stand facing the corner.
Rooms with the door open. Many parents prefer a room for time-out because it offers more confinement than a chair. The most convenient and safest room for time-out is the child’s bedroom, though making the bedroom a place of punishment can cause sleep issues. Until two years of age, most children become frightened if they are put in a room with a closed door. Other ways to confine your child in a room without completely closing him off are a gate or a piece of plywood that covers the bottom half of the door.
Rooms with the door closed. Some children will come out of the room just as soon as they are put in. If you cannot devise a barricade, then the door must be closed. You can hold the door closed for the three to five minutes it takes to complete the time-out period. If you don’t want to hold the door, you can put a latch on the door that allows it to be temporarily locked. Be sure not to forget your child. The time-out should not last longer than a few minutes (one minute per year of age).
How to Administer Time-Out
Deciding the length of time-out. The time-out should be long enough for your child to think about his misbehavior and learn the acceptable behavior. A good rule of thumb is one minute per year of the child’s age, with a maximum of five minutes. A kitchen timer can be set for the required number of minutes. If your child leaves time-out early (“escapes”), he should be returned to time-out and the timer should be reset. By the age of six years, most children can be sent to their room and asked to stay there until they feel ready to behave.
Putting your child in time-out. If your child misbehaves, briefly explain the rule she has broken and send her to the time-out chair or room. If your child doesn’t go immediately, lead or carry her there. Expect your child to cry, protest, or have a tantrum on the way to
time-out. Don’t lecture or spank her on the way.
Keeping your child in time-out. Once children understand time-out, most of them will stay in their chair, corner, or room until the time is up. However, you will have to keep an eye on your child. If he gets up from a chair, put him back gently but quickly without spanking him and reset the timer. If your child comes out of the room, direct him back into the room and reset the timer. Threaten to close the door if he comes out a second time. If your child is a strong-willed two- or three-year-old and you are just beginning to use time-outs, you may initially need to hold him in the chair with one hand on his shoulder for the entire two minutes. Don’t be discouraged; this does teach him that you mean what you say. If your child yells or cries during time-out, ignore it. The important thing is that he remains in time-out for a certain amount of time. Your child will not be able to understand the need for quietness during time-out until at least three years of age, so don’t expect this of him before then.
Ending the time-out. Make it clear that you are in charge of when time-out ends. When the time is up, go to your child and state, “Time-out is over. You can get up (or come out) now.” Then treat your child normally. Don’t review the rule your child broke. Try to notice when your child does something that pleases you and praise her for it as soon as possible.
Practicing time-out with your child. If you have not used time-out before, explain it to your child in advance. Tell him it will replace spanking, yelling, and other such forms of discipline. Talk to him about the misbehaviors that will lead to time-outs. Also discuss with him the good behavior that you would prefer to see. Then pretend with your child that he has broken one of the rules. Take him through the steps of time-out so that he will understand your directions when you send him to time-out in the future. Also teach your baby-sitter about time-outs.
Car Safety Seats
The major killer and crippler of children in the United States is motor vehicle crashes. Improper use of
child safety seats causes death or injury in thousands of children each year. Seven out of ten children in child safety seats are not properly buckled in.
Important safety rules
-
Always use a car safety seat, starting with your baby's first ride home from the hospital.
-
Never place a child in a rear-facing car safety seat in the front seat of a vehicle that has an airbag.
-
The safest place for all small children to ride is in the back seat.
-
Set a good example: always wear your seat belt. Help your child form a lifelong habit of buckling up.
-
Remember that each car safety seat is different. Read and keep the instructions that came with your seat.
-
Read the owner's manual that came with your car on how to correctly install car safety seats.
Choosing a Car Seat
Choose a car safety seat that is right for your child’s age and size.
| AGE GROUP |
TYPE OF SEAT |
GENERAL GUIDELINES |
| Infants/Toddlers |
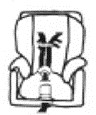
Rear-facing only seats and rear-facing convertible seats |
All infants and toddlers should ride in a Rear-Facing Car Seat until they are 2 years of age or until they reach the highest weight or height allowed by their car safety seat's manufacturer. |
| Toddlers/Preschoolers |
Convertible seats and forward-facing seats with harness |
All children 2 years or older, or those younger than 2 years who have outgrown the rear-facing weight or height limit for their car seat, should use a Forward- Facing Car Seat with a harness for as long as possible, up to the highest weight or height allowed by their car seat's manufacturer. |
| School-Aged Children |
Booster seats |
All children whose weight or height is above the forward-facing limit for their car seat should use a Belt-Positioning Booster Seat until the vehicle seat belt fits properly across their shoulder, typically when they have reached 4 feet 9 inches in height and are between 8 and 12 years of age. |
| Older Children |
Seat belts |
When children are old enough and large enough to use the vehicle seat belt alone, they should always use Lap and Shoulder Seat Belts for optimal protection. All children younger than 13 years should be restrained in the rear seats of vehicles for optimal protection. |
Infant-Only Seats
-
These are small and portable (sometimes come as part of a stroller system).
-
These have a 3-point or 5-point harness.
-
They can only be used for infants up to 20 - 35 pounds, depending on the model.
-
Many come with detachable base, which can be left in the car. The seat clicks in and out of the base, which means you don’t have to install it each time you use it.
-
Most have carrying handles.
Convertible Seats
-
These are bigger than infant-only seats.
-
These can also be used forward-facing for older and larger children; therefore, these seats can be used longer.
-
Many have higher rear-facing weight limits than infant-only seats. These are ideal for bigger babies.
-
They may have the following types of harnesses.
 |
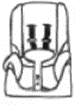
5-Point Harness
5 Straps:
2 at the shoulders
2 at the hips
1 at the crotch
|
 |
T-Shield
A padded T-shaped
or triangle-shaped
shield attached to the
shoulder straps.
|
 |
Overhed Shield
A padded tray-like shield that swings.
|
Booster Seats
Your child should stay in a car seat with a harness as long as possible (i.e. as long as they fit the weight and height limits of the car seat) and then ride in a belt-positioning booster seat. You can tell when your child is ready for a booster seat when one of the following is true:
-
He reaches the top weight or height allowed for the seat.
-
His shoulders are above the harness slots.
-
His ears have reached the top of the seat.
Booster seats are designed to raise your child so that the lap/shoulder belt fits properly. This means the lap belt is across your child’s pelvis and the shoulder belt crosses the middle of your child’s chest and shoulder. Correct belt fit helps protect the stomach, spine, and head from injury. Both high-backed and backless models are available. Booster seats should be used until your child can correctly fit in a lap/shoulder belt, which is typically when a child is at least 4’9” and 8-12 years old.
Government safety standards
Since January 1981, all manufacturers of child safety seats have been required to meet stringent government safety standards, including crash-testing. Choose a seat that has met Federal Motor Vehicle Safety Standard 213, with 1981 or later as the year of manufacture. When in doubt or if you have questions about installing your car safety seat, Child Passenger Safety (CPS) Technicians can help you. A list of inspection stations is available at www.seatcheck.org. You can also get this information by calling the National Highway Traffic Safety Administration (NHTSA) Auto Safety Hot Line at 888-327-4236. The American Academy of Pediatrics also publishes a list of infant/child safety seats that is updated yearly. To obtain this list, go to http://www.healthychildren.org/English/safety-prevention/on-the-go/pages/ Car-Safety-Seats-Product-Listing.aspx. California Law
California law (as of 1/1/2012) states that each child must be properly restrained in a child safety seat or
booster seat in the back seat of the car until the child is 8 years old or at least 4’9” in height. The law specifically states that:
-
Children under the age of 8 must be secured in a car seat or booster seat in the back seat.
-
Children under the age of 8 who are 4’9” or taller may be secured by a safety belt in the back seat.
-
Children who are 8 years and over shall be properly secured in an appropriate child passenger restraint system or safety belt.
-
Passengers who are 16 years of age and over are subject to California’s Mandatory Seat Belt law.
Exceptions to the law are:
-
There is no rear seat.
-
The rear seats are side-facing jump seats.
-
The Child Passenger Restraint System cannot be installed properly in the rear seat.
-
All rear seats are already occupied by children under the age of 7 years.
-
Medical reasons necessitate that the child or ward not ride in the rear seat. The court may require satisfactory proof of the child's medical condition.
A child may NOT ride in the front seat with an active passenger airbag if:
-
The child is under one year of age,
-
The child weighs less than 20 pounds, or
-
The child is riding in a rear-facing Child Passenger Restraint System.
Sun Protection
Protect Your Child from the Number One Cause of Cancer: The Sun!
Did You Know?
-
Skin cancer is the most common type of cancer.
-
Many skin cancers can be prevented.
-
Ultraviolet (UV) radiation, which causes skin cancer, is present even in the shade, on cloudy days, or in the winter months when the sun isn't as strong as a bright summer day.
-
Childhood sun exposure is especially important in terms of cancer. A child or adolescent who has had 5 or more sunburns is twice as likely to get melanoma.
-
UV exposure is especially high in locations like San Diego, which are nearer to the equator.
Sunburn
Sunburn is caused by overexposure of the skin to the ultraviolet (UVA/UVB) rays of the sun or a sun lamp. Minor sunburn is a first degree burn which turns the skin pink or red with swelling and pain. Prolonged sun exposure can cause blistering and a second-degree burn. Sunburn does not cause third degree burns or scarring. Blistering sunburns, especially in childhood, significantly increase the risk for future skin cancers including malignant melanoma.
Tips For Enjoying the Sun Safely
-
Apply sunscreen to your baby or child anytime she will be outdoors for more than a few minutes at a time, even in the winter or if you plan to stay in the shade. If you have a family rule that everyone wears sunscreen before going outside and you start at an early age, your child is more likely to cooperate when she's older. Apply sunscreen 30 minutes before going outdoors for best absorption.
-
Pick the right sunscreen. The higher the SPF, the more protective the sunscreen is. Sunscreen with titanium or zinc in it provides a physical as well as chemical barrier and protects better than other sunscreens. Waterproof sunscreen is helpful, but even waterproof sunscreen needs to be reapplied after water exposure. Spray-on sunscreen is less effective than traditional lotion. Suntan lotion or oils are mainly lubricants and do not block the sun's burning rays and may even cause more burning.
-
Reapply sunscreen every 2 hours (even on cloudy days) and after swimming or sweating.
-
Put on a hat. If you insist that your child wears a hat from the time, she is a young infant, she is more likely to keep hats on when she is older.
-
Cover up. Whenever possible, keep your child covered with long sleeves, long pants, a wide brimmed hat, and sunglasses with plastic lenses with UVA/UVB protection. Darker clothes block more sun than light clothes. Tightly woven fabric is more protective than looser weaves. UPF clothes are specially designed clothing that are more effective at blocking the sun than regular clothing.
-
Avoid being out in the sun between 10:00 am and 4:00 pm if possible. Stay in the shade when possible.
-
Be careful at high altitude and near reflective surfaces. Sun exposure increases at higher altitudes. Water, sand, and snow increase sun exposure through reflected rays.
-
Avoid tanning, either in the sun or in a tanning booth.
When Sunburn Happens
Acetaminophen (Tylenol) or ibuprofen (Advil, Motrin) can be used to reduce discomfort. Cool baths and/or wearing cool wet clothes on burned areas can be more comfortable. Drink plenty of water and keep well hydrated.
Moisturizing or aloe creams applied several times a day may reduce swelling and pain. Do not use petroleum jelly or other ointments that inhibit heat and sweat from escaping because these prolong healing. First aid creams or sprays for burns often contain benzocaine, which can cause an allergic reaction.
Call Our Office Immediately If:
-
Your child becomes unable to look at lights because of eye pain.
-
An unexpected fever over 102°F (38.9°C) occurs along with a sunburn.
-
The sunburn becomes infected.
-
An infant less than one year old sustains a second-degree burn.
Call Our Office During Office Hours If:
|