Well-Child Checkup: 24 Months
I like to think I am a pretty independent person at this age. I like to do what I want, when I want to do it. I tend to rebel at any attempt to lead me. I can feed myself with utensils and drink well from a cup or glass now. I don’t need my bottle anymore.
I can speak in short phrases and sentences, and this helps me express some of my needs and frustrations. I am learning to control my bladder and bowel function during the day, though I may not want to and can forget.
Please remember to:
Use my car seat in the backseat of the car, but you can now turn me to face forward. Limit my screen time (TV, computer, Smartphone, video games, etc.). Save time for quiet reading and game activities. Watch me and my toys near sidewalks and street corners. Do not get trapped into arguing with me. Teach me about discipline in a loving but firm, consistent way.
Toilet-Training Basics
Definition
Your child is toilet-trained when, without any reminders, your child walks to the potty, undresses, urinates or has a bowel movement, and pulls up his pants. Some children will learn to control their bladders first; others will start with bowel control. Both kinds of control through the night normally happens several years later than daytime control. The gradual type of toilet training discussed here can usually be completed in two weeks to two months.
Toilet-Training Readiness
Don’t begin training until your child is clearly ready. Readiness doesn’t just happen; it involves concepts and skills you can begin teaching your child at 12 months of age. Reading some of the special toilet-learning books to your child can help. Most children can be made ready for toilet training by 24 months of age and some even by 18 months. If you don't actively try to toilet train your child, by the time she is three years old, she will probably have trained herself, and this is a perfectly fine approach.
The following signs indicate that your child is ready:
-
Your child understands what “pee,” “poop,” “dry,” “wet,” “clean,” “messy,” and “potty” mean. (Teach these words.)
-
Your child understands what the potty is for. (Teach this by having your child watch parents, older siblings, and children near his age use the toilet correctly.
-
Your child prefers dry, clean diapers. (Change your child frequently to encourage this preference.)
-
Your child likes to be changed. (As soon as she is able to walk, teach her to come to you immediately whenever she is wet or dirty. Praise her for coming to you for a change).
-
Your child understands the connection between dry pants and using the potty.
-
Your child can recognize the feeling of a full bladder and the urge to have a bowel movement; that is, he paces, jumps up and down, holds his genitals, pulls at his pants, squats down, or tells you. (Clarify for him: “The poop [or pee] wants to come out. It needs your help”).
-
Your child has the ability to briefly postpone urinating or having a bowel movement. She may go off by herself and come back wet or soiled, or she may wake up from naps dry.
Method for Toilet Training
The way to train your child is to offer encouragement and praise, be patient, and make the process fun. Avoid any pressure or punishment. Your child must feel in control of the process.
Buy supplies.
-
Potty chair (floor-level type). If your child’s feet can reach the floor while he sits on the potty, he has leverage for pushing and a sense of security. He also can get on and off whenever he wants to.
-
Stickers or stars for rewards.
Make the potty chair one of your child’s favorite possessions. Several weeks before you plan to begin toilet training, take your child with you to buy a potty chair. Have your child help you put her name on it. Allow your child to decorate it or even paint it a different color. Then have your child sit on it as a chair. Have your child use it while watching TV, eating snacks, playing games, or looking at books. Keep it in the room in which your child usually plays. Only after your child clearly has good feelings toward the potty chair (after at least one week), proceed to actual toilet training.
Encourage practice runs on the potty. Do a practice run whenever your child gives a signal that looks promising, such as a certain facial expression, grunting, holding the genital area, pulling at his pants, pacing, squatting, squirming, or passing gas. Other good times are after naps or 20 minutes after meals. Say encouragingly, “The poop (or pee) wants to come out. Let’s use the potty.” Encourage your child to walk to the potty and sit there with his diapers or pants off. Your child can then be told, “Try to go pee-pee in the potty.” If your child is reluctant to cooperate, he can be encouraged to sit on the potty by doing something fun, for example, you might read a story. If your child wants to get up after one minute of encouragement, let him get up. Never force your child to sit there. Never physically hold your child there or strap him in. Even if your child seems to be enjoying it, end each session after five minutes unless something is happening.
Praise or reward your child for cooperation or any success. All cooperation with these practice sessions should be praised. For example, you might say, “You are sitting on the potty just like Mommy,” or “You’re trying really hard to put the pee-pee in the potty.” If your child urinates into the potty, she can be rewarded with small presents or stickers, as well as praise and hugs. Although a sense of accomplishment is enough for some children, others need rewards to stay focused. Big rewards (such as going to the ice cream store) should be reserved for when your child walks over to the potty on her own and uses it, or when your child asks to go there with you and then uses it. Once your child uses the potty by herself two or more times, you can stop the practice runs. For the following week, con- tinue to praise your child frequently for dryness and using the potty. (Note: Practice runs and reminders should not be necessary for more than one or two months.)
Change your child after accidents. Change your child as soon as it’s convenient, and respond sympathetically. Say something like, “You wanted to go pee-pee in the potty, but you went pee-pee in your pants. I know that makes you sad. You like to be dry. You’ll get better at this.” If you feel a need to be critical, keep to mild verbal disapproval and use it rarely (for example, “Big boys don’t go pee-pee in their pants,” or mention the name of another child he likes who is trained); then change your child into a dry diaper or training pants in as pleasant and
non-angry a way as possible. Never use physical punishment, yelling, or scolding. Using pressure or force can make a two-year-old child completely uncooperative. Do not keep your child in wet or messy pants for punishment.
Introduce training pants after your child starts using the potty. Switch from diapers to training pants after your child is cooperative about sitting on the potty chair and passes about half of her urine and bowel movements there. She definitely needs training pants if she comes to you to help her take off her diaper so she can use the potty. Take your child with you to buy the underwear and make it a reward for her success. Buy loose-fitting ones that she can easily lower and pull up by herself. Once you start using training pants, use diapers only for naps and nighttime.
Talk with Your Child's Doctor If:
-
Your child won’t sit on the potty or toilet.
-
Your two-and-a-half-year-old child is negative about toilet training.
-
You begin to use force or punishment.
-
Your child is over three years old and not daytime toilet trained.
-
The approach described here isn’t working after two months.
-
You have any other questions or concerns.
Recommended Reading
Joanna Cole: The Parents’ Book of Toilet Teaching, Ballantine Books, N.Y., 1983.
Vicki Lansky: Koko Bear’s New Potty, Bantam Books, N.Y., 1986.
Alison Mack: Toilet Learning, Little, Brown, Boston, 1978.
Discipline: Time-Out Technique
Definition
Time-out is a form of discipline used to
interrupt unacceptable behavior by isolating a child in a chair or room for a brief period of time. Time-out has the advantage of providing a cooling-off period for both the child and the parent. It gives a child over two or three years old a chance to think about his misbehavior and feel a little guilty about it. When a child is less than two years old, time-out mainly establishes who is in charge.
Misbehaviors that respond best to time-out are aggressive, harmful, or disruptive behaviors that cannot be ignored. Time-out is much more effective than spanking, threatening, or shouting at your child. Time-out is the best form of discipline for many of the irrational behaviors of toddlers. As a child grows older, use of time-outs can gradually be replaced with logical consequences.
Choosing a Place for Time-Out
Playpens. Playpens are a convenient place for time-out for older infants. A playpen near a parent is preferable to isolation in another room because most infants are frightened if they are not in the same room as their parent. Cribs are not an ideal location for time-out because this can lead to sleep problems.
Chairs or corners. An older child can be told to sit in a chair. The chair can be placed facing a corner. Some parents prefer to have their child stand facing the corner.
Rooms with the door open. Many parents prefer a room for time-out because it offers more confinement than a chair. The most convenient and safest room for time-out is the child’s bedroom, though making the bedroom a place of punishment can cause sleep issues. Until two years of age, most children become frightened if they are put in a room with a closed door. Other ways to confine your child in a room without completely closing him off are a gate or a piece of plywood that covers the bottom half of the door.
Rooms with the door closed. Some children will come out of the room just as soon as they are put in. If you cannot devise a barricade, then the door must be closed. You can hold the door closed for the three to five minutes it takes to complete the time-out period. If you don’t want to hold the door, you can put a latch on the door that allows it to be temporarily locked. Be sure not to forget your child. The time-out should not last longer than a few minutes (one minute per year of age).
How to Administer Time-Out
Deciding the length of time-out. The time-out should be long enough for your child to think about his misbehavior and learn the acceptable behavior. A good rule of thumb is one minute per year of the child’s age, with a maximum of five minutes. A kitchen timer can be set for the required number of minutes. If your child leaves time-out early (“escapes”), he should be returned to time-out and the timer should be reset. By the age of six years, most children can be sent to their room and asked to stay there until they feel ready to behave.
Putting your child in time-out. If your child misbehaves, briefly explain the rule she has broken and send her to the time-out chair or room. If your child doesn’t go immediately, lead or carry her there. Expect your child to cry, protest, or have a tantrum on the way to
time-out. Don’t lecture or spank her on the way.
Keeping your child in time-out. Once children understand time-out, most of them will stay in their chair, corner, or room until the time is up. However, you will have to keep an eye on your child. If he gets up from a chair, put him back gently but quickly without spanking him and reset the timer. If your child comes out of the room, direct him back into the room and reset the timer. Threaten to close the door if he comes out a second time. If your child is a strong-willed two- or three-year-old and you are just beginning to use time-outs, you may initially need to hold him in the chair with one hand on his shoulder for the entire two minutes. Don’t be discouraged; this does teach him that you mean what you say. If your child yells or cries during time-out, ignore it. The important thing is that he remains in time-out for a certain amount of time. Your child will not be able to understand the need for quietness during time-out until at least three years of age, so don’t expect this of him before then.
Ending the time-out. Make it clear that you are in charge of when time-out ends. When the time is up, go to your child and state, “Time-out is over. You can get up (or come out) now.” Then treat your child normally. Don’t review the rule your child broke. Try to notice when your child does something that pleases you and praise her for it as soon as possible.
Practicing time-out with your child. If you have not used time-out before, explain it to your child in advance. Tell him it will replace spanking, yelling, and other such forms of discipline. Talk to him about the misbehaviors that will lead to time-outs. Also discuss with him the good behavior that you would prefer to see. Then pretend with your child that he has broken one of the rules. Take him through the steps of time-out so that he will understand your directions when you send him to time-out in the future. Also teach your baby-sitter about time-outs.
Car Safety Seats
The major killer and crippler of children in the United States is motor vehicle crashes. Improper use of
child safety seats causes death or injury in thousands of children each year. Seven out of ten children in child safety seats are not properly buckled in.
Important safety rules
-
Always use a car safety seat, starting with your baby's first ride home from the hospital.
-
Never place a child in a rear-facing car safety seat in the front seat of a vehicle that has an airbag.
-
The safest place for all small children to ride is in the back seat.
-
Set a good example: always wear your seat belt. Help your child form a lifelong habit of buckling up.
-
Remember that each car safety seat is different. Read and keep the instructions that came with your seat.
-
Read the owner's manual that came with your car on how to correctly install car safety seats.
Choosing a Car Seat
Choose a car safety seat that is right for your child’s age and size.
| AGE GROUP |
TYPE OF SEAT |
GENERAL GUIDELINES |
| Infants/Toddlers |
Rear-facing only seats and rear-facing convertible seats |
All infants and toddlers should ride in a Rear-Facing Car Seat until they are 2 years of age or until they reach the highest weight or height allowed by their car safety seat's manufacturer. |
| Toddlers/Preschoolers |
Convertible seats and forward-facing seats with harness |
All children 2 years or older, or those younger than 2 years who have outgrown the rear-facing weight or height limit for their car seat, should use a Forward- Facing Car Seat with a harness for as long as possible, up to the highest weight or height allowed by their car seat's manufacturer. |
| School-Aged Children |
Booster seats |
All children whose weight or height is above the forward-facing limit for their car seat should use a Belt-Positioning Booster Seat until the vehicle seat belt fits properly across their shoulder, typically when they have reached 4 feet 9 inches in height and are between 8 and 12 years of age. |
| Older Children |
Seat belts |
When children are old enough and large enough to use the vehicle seat belt alone, they should always use Lap and Shoulder Seat Belts for optimal protection. All children younger than 13 years should be restrained in the rear seats of vehicles for optimal protection. |
Infant-Only Seats
-
These are small and portable (sometimes come as part of a stroller system).
-
These have a 3-point or 5-point harness.
-
They can only be used for infants up to 20 - 35 pounds, depending on the model.
-
Many come with detachable base, which can be left in the car. The seat clicks in and out of the base, which means you don’t have to install it each time you use it.
-
Most have carrying handles.
Convertible Seats
-
These are bigger than infant-only seats.
-
These can also be used forward-facing for older and larger children; therefore, these seats can be used longer.
-
Many have higher rear-facing weight limits than infant-only seats. These are ideal for bigger babies.
-
They may have the following types of harnesses.
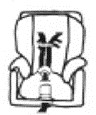 |
5-Point Harness
5 Straps:
2 at the shoulders
2 at the hips
1 at the crotch
|
 |
T-Shield
A padded T-shaped
or triangle-shaped
shield attached to the
shoulder straps.
|
 |
Overhed Shield
A padded tray-like shield that swings.
|
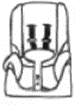
Booster Seats
Your child should stay in a car seat with a harness as long as possible (i.e. as long as they fit the weight and height limits of the car seat) and then ride in a belt-positioning booster seat. You can tell when your child is ready for a booster seat when one of the following is true:
-
He reaches the top weight or height allowed for the seat.
-
His shoulders are above the harness slots.
-
His ears have reached the top of the seat.
Booster seats are designed to raise your child so that the lap/shoulder belt fits properly. This means the lap belt is across your child’s pelvis and the shoulder belt crosses the middle of your child’s chest and shoulder. Correct belt fit helps protect the stomach, spine, and head from injury. Both high-backed and backless models are available. Booster seats should be used until your child can correctly fit in a lap/shoulder belt, which is typically when a child is at least 4’9” and 8-12 years old.
Government safety standards
Since January 1981, all manufacturers of child safety seats have been required to meet stringent government safety standards, including crash-testing. Choose a seat that has met Federal Motor Vehicle Safety Standard 213, with 1981 or later as the year of manufacture. When in doubt or if you have questions about installing your car safety seat, Child Passenger Safety (CPS) Technicians can help you. A list of inspection stations is available at www.seatcheck.org. You can also get this information by calling the National Highway Traffic Safety Administration (NHTSA) Auto Safety Hot Line at 888-327-4236. The American Academy of Pediatrics also publishes a list of infant/child safety seats that is updated yearly. To obtain this list, go to http://www.healthychildren.org/English/safety-prevention/on-the-go/pages/ Car-Safety-Seats-Product-Listing.aspx. California Law
California law (as of 1/1/2012) states that each child must be properly restrained in a child safety seat or
booster seat in the back seat of the car until the child is 8 years old or at least 4’9” in height. The law specifically states that:
-
Children under the age of 8 must be secured in a car seat or booster seat in the back seat.
-
Children under the age of 8 who are 4’9” or taller may be secured by a safety belt in the back seat.
-
Children who are 8 years and over shall be properly secured in an appropriate child passenger restraint system or safety belt.
-
Passengers who are 16 years of age and over are subject to California’s Mandatory Seat Belt law.
Exceptions to the law are:
-
There is no rear seat.
-
The rear seats are side-facing jump seats.
-
The Child Passenger Restraint System cannot be installed properly in the rear seat.
-
All rear seats are already occupied by children under the age of 7 years.
-
Medical reasons necessitate that the child or ward not ride in the rear seat. The court may require satisfactory proof of the child's medical condition.
A child may NOT ride in the front seat with an active passenger airbag if:
-
The child is under one year of age,
-
The child weighs less than 20 pounds, or
-
The child is riding in a rear-facing Child Passenger Restraint System.
Sun Protection
Protect Your Child from the Number One Cause of Cancer: The Sun!
Did You Know?
-
Skin cancer is the most common type of cancer.
-
Many skin cancers can be prevented.
-
Ultraviolet (UV) radiation, which causes skin cancer, is present even in the shade, on cloudy days, or in the winter months when the sun isn't as strong as a bright summer day.
-
Childhood sun exposure is especially important in terms of cancer. A child or adolescent who has had 5 or more sunburns is twice as likely to get melanoma.
-
UV exposure is especially high in locations like San Diego, which are nearer to the equator.
Sunburn
Sunburn is caused by overexposure of the skin to the ultraviolet (UVA/UVB) rays of the sun or a sun lamp. Minor sunburn is a first degree burn which turns the skin pink or red with swelling and pain. Prolonged sun exposure can cause blistering and a second-degree burn. Sunburn does not cause third degree burns or scarring. Blistering sunburns, especially in childhood, significantly increase the risk for future skin cancers including malignant melanoma.
Tips For Enjoying the Sun Safely
-
Apply sunscreen to your baby or child anytime she will be outdoors for more than a few minutes at a time, even in the winter or if you plan to stay in the shade. If you have a family rule that everyone wears sunscreen before going outside and you start at an early age, your child is more likely to cooperate when she's older. Apply sunscreen 30 minutes before going outdoors for best absorption.
-
Pick the right sunscreen. The higher the SPF, the more protective the sunscreen is. Sunscreen with titanium or zinc in it provides a physical as well as chemical barrier and protects better than other sunscreens. Waterproof sunscreen is helpful, but even waterproof sunscreen needs to be reapplied after water exposure. Spray-on sunscreen is less effective than traditional lotion. Suntan lotion or oils are mainly lubricants and do not block the sun's burning rays and may even cause more burning.
-
Reapply sunscreen every 2 hours (even on cloudy days) and after swimming or sweating.
-
Put on a hat. If you insist that your child wears a hat from the time, she is a young infant, she is more likely to keep hats on when she is older.
-
Cover up. Whenever possible, keep your child covered with long sleeves, long pants, a wide brimmed hat, and sunglasses with plastic lenses with UVA/UVB protection. Darker clothes block more sun than light clothes. Tightly woven fabric is more protective than looser weaves. UPF clothes are specially designed clothing that are more effective at blocking the sun than regular clothing.
-
Avoid being out in the sun between 10:00 am and 4:00 pm if possible. Stay in the shade when possible.
-
Be careful at high altitude and near reflective surfaces. Sun exposure increases at higher altitudes. Water, sand, and snow increase sun exposure through reflected rays.
-
Avoid tanning, either in the sun or in a tanning booth.
When Sunburn Happens
Acetaminophen (Tylenol) or ibuprofen (Advil, Motrin) can be used to reduce discomfort. Cool baths and/or wearing cool wet clothes on burned areas can be more comfortable. Drink plenty of water and keep well hydrated.
Moisturizing or aloe creams applied several times a day may reduce swelling and pain. Do not use petroleum jelly or other ointments that inhibit heat and sweat from escaping because these prolong healing. First aid creams or sprays for burns often contain benzocaine, which can cause an allergic reaction.
Call Our Office Immediately If:
-
Your child becomes unable to look at lights because of eye pain.
-
An unexpected fever over 102°F (38.9°C) occurs along with a sunburn.
-
The sunburn becomes infected.
-
An infant less than one year old sustains a second-degree burn.
Call Our Office During Office Hours If:
|